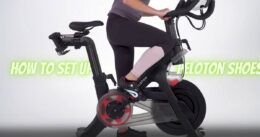
Hey Peloton buddies! Wondering how to turn your ride into a blissful breeze? Well, here’s the scoop – after some serious Peloton shoe sleuthing (yes, we’re talking real-deal research!), we’ve cracked the code to make your rides a comfort fiesta. There is no need for a science degree – just simple tips to make your shoes your ride-or-die companions. We’re talking about sizing sweet spots (no more toe tap-dancing!), decoding those cleat mysteries, and transforming your Peloton into a comforting cocoon. We’ve done the nerdy legwork; now, you just focus on the fun – riding high and smiling wide. Let’s make your Peloton journey epic, backed by some legit research magic!
Understanding Peloton Shoes
The Awesome Choices in Peloton Shoes
Hey, let’s talk Peloton shoes—because they’re not just shoes; they’re your biking buddies! First up, you’ve got the classic Peloton Bike Shoes, perfect for the OG Peloton Bike. They’re like the comfy sneakers you’ve had forever, with a simple two-bolt cleat system making them a breeze to use. But if you’ve leveled up to the Peloton Bike+, enter the Peloton Bike+ Shoes. These bad boys rock a three-bolt cleat system, adding that extra kick for an upgraded ride. It’s like choosing between your trusty old tunes and the latest beats—both awesome. It just depends on your vibe!
Why Peloton Shoes Are Your Ride-or-Die Companions
Now, let’s get into the nitty-gritty of what makes Peloton shoes your go-to for pedal power. Picture this: breathable designs that let your feet chill during those intense rides—no sweaty business here! The materials are top-notch for durability, like having a reliable workout buddy who never skips leg day. Straps and fasteners? They’re like your personal support crew, keeping your feet snug and secure without any awkward slips. And the ergonomic design? It’s like the fancy contour pillow for your feet, making every pedal stroke comfy and efficient. So, when it comes to Peloton shoes, it’s not just about style; it’s about a ride that feels as good as it looks.
Matching Shoes With Your Peloton Ride
Let’s talk compatibility because we want your shoes and bike to be the ultimate power couple. Standard Peloton Bike Shoes groove perfectly with the original Peloton Bike, creating a seamless duo with their two-bolt cleat system. Now, if you’re rolling with the Peloton Bike+, you’ll want the Peloton Bike+ Shoes. These shoes are the match made in biking heaven, syncing up with the three-bolt cleat system for a ride that’s smooth as butter. It’s like making sure your favorite snacks are at the party—check Peloton’s compatibility guidelines before you hit that ‘buy’ button. That way, your shoes and bike can kick it together like the best duo on the fitness scene. So, lace up, strap in, and get ready for a ride that’s as easy as Sunday morning.
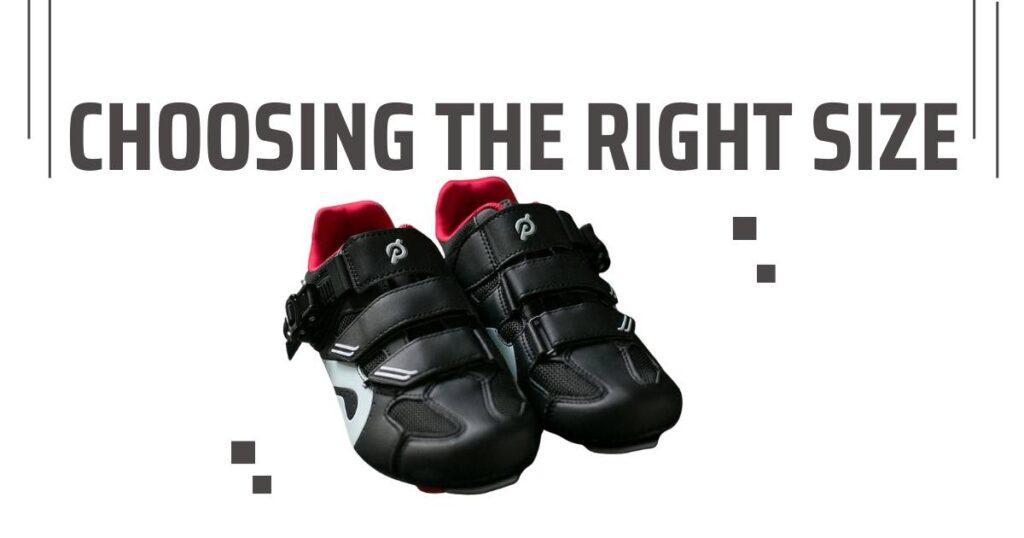
Choosing the Right Size
Importance of Proper Shoe Size for Comfort and Performance
Finding the perfect size for your Peloton shoes is like discovering the comfiest spot on the couch – it makes all the difference. Think of it as the superhero cape for your feet during those workout adventures. Shoes that hug too tight or slide around can turn your fitness journey into a not-so-fun rollercoaster. The right size is the key to happy feet and a workout that feels like a breeze. So, don’t just settle for “close enough” – aim for the size that’s just right, like a cozy hug for your feet.
Sizing Guides Provided by Peloton
Lucky for us, Peloton is like the fairy godparent of shoe sizing. They’ve got these magical sizing guides that take the guesswork out of finding your Cinderella fit. It’s like having a personal shopper but for your feet. These guides are your secret weapon against the woes of ordering shoes online. Take a peek, follow the instructions, and voila – you’ve got your shoe size mapped out. Let Peloton’s sizing guides be your trusty sidekick in the quest for the perfect fit, making sure you step into each workout with confidence and comfort.
Tips for Measuring Your Foot to Determine the Correct Size
Now, let’s talk about measuring your foot – it’s DIY detective work for your perfect fit. Grab a piece of paper a pen, and channel your inner artist. Trace your feet like you’re creating a masterpiece. Once you’ve got those foot outlines, whip out your ruler and measure away. It’s like solving a puzzle where the pieces are your foot dimensions. Don’t forget to measure both feet because, hey, our feet have their quirks too. With these simple steps, you’re on your way to being the Sherlock Holmes of shoe sizing, ensuring that every Peloton ride feels tailor-made for you. Lace up, and let’s hit the road – or should I say the Peloton!
Unveiling Your Peloton Shoes
Picture this as the grand opening of your fitness adventure – unboxing your Peloton shoes is like unwrapping a gift of pure workout joy. Carefully crack open that shoebox, revealing the sleek, stylish wonders inside. Take a moment to savor the craftsmanship Peloton is famous for – it’s like meeting a new workout buddy. Lay those beauties out, pay attention to any hidden surprises (info booklets or cool extras), and get ready for the setup journey.
Now, onto the detective work. Check your shoes with a close-up lens, looking for any hiccups like wonky stitching or material quirks. Make sure those cleats are snug and ready for action. If anything seems off, don’t sweat it – Peloton’s support team is there to rescue your workout dreams. Next, do a quick gear check. Cleats? Straps? Fasteners? All present and accounted for? Perfect. It’s like making sure you’ve got all your ingredients before cooking up a storm.
Ready, set, ride – your Peloton shoes are prepped and pumped, and you’re about to pedal into fitness bliss. Let’s make those workouts as smooth as your unboxing experience.
Installing Cleats
Understanding Cleats and Their Role in Cycling
Let’s talk about the unsung heroes of your Peloton ride – cleats! These little buddies may be tiny, but they’re the magic glue that connects your Peloton shoes to the pedals. Imagine them as the secret sauce that turns every pedal push into a smooth, powerful dance with your bike. Cleats are like the trusty sidekick, ensuring your energy flows into the bike with every spin. And the best part? They’re smart enough to let go when you need to, keeping your ride safe and stress-free.
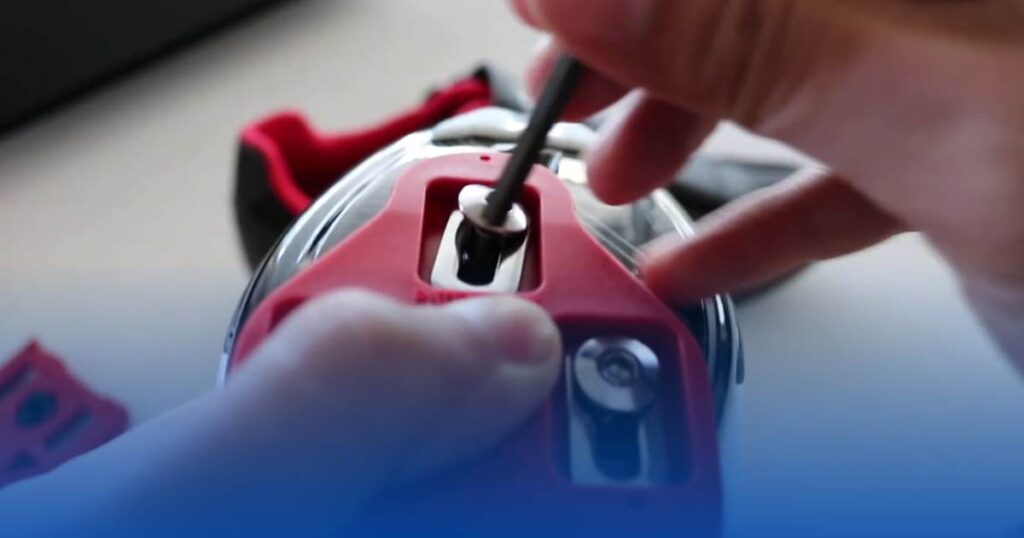
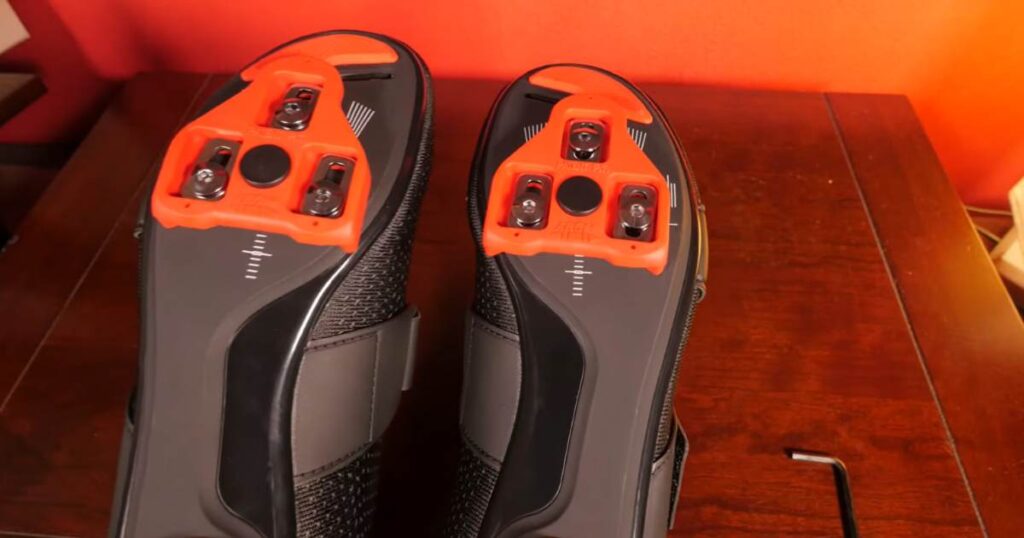
Step-by-Step Guide on How to Install Cleats on Peloton Shoes
Now, let’s turn your Peloton shoes into pedal pals! Find those cleverly marked cleat holes on your shoes, and grab the cleats that came with them – like the perfect puzzle pieces. With the included screws and a friendly screwdriver, attach the cleats snugly but not too tight. Think of it like giving your shoes a high-five with a twist. Repeat the process for the other shoe, and there you go – your Peloton shoes are now Cleat-Ready Superheroes, ready to conquer your cycling adventures.
Adjusting Cleat Position for Optimal Comfort and Efficiency
It’s time for some personalization magic! Cleat positions aren’t one-size-fits-all. It’s about finding your comfy sweet spot. Start simple: place the cleats under the ball of your foot, that bony spot near your big toe. But here’s the fun part – hop on your Peloton, start pedaling, and pay attention to how your feet feel. If there’s any “ouch” or “uh-oh,” it’s tweak time. Shift those cleats a smidge forward, backward, or sideways until it feels like your shoes are giving your feet a cozy hug. Take your time, enjoy the process, and let your feet revel in the customized comfort of your Peloton journey. Happy riding!
Strap in for Comfort: Your Peloton Shoes’ Secret Sauce!
Alright, let’s talk about the magic that keeps your feet happy on the Peloton – those straps and fasteners! Imagine them as your shoe’s superhero cape, designed to keep everything in check during your cycling adventures. These adjustable buddies are like the sidekicks, ensuring your feet stay snug without feeling like they’re in a vice grip. So, here’s the scoop: before you hit the pedals, loosen those straps, slide your feet in like a breeze, and then start the tightening game. It’s a bit like finding the perfect level of coziness in your favorite pair of slippers – not too loose, not too tight. Give those straps a tweak, pay attention to your tootsies, and voilà! You’re on your way to a ride that’s not just about burning calories but enjoying every pedal, feeling comfy and carefree. Cheers to finding your perfect fit, and happy pedaling!
Testing and Fine-Tuning
Initial Short Rides to Test the Setup
Alright, let’s talk about those first Peloton rides – the mini adventures that set the stage for your biking bliss. Think of it like trying out a new pair of shoes; you want to make sure they’re comfy from the get-go. So, hop on and pedal away, paying attention to how your feet feel in those snazzy Peloton shoes. If something’s not quite right – a pinch here, a squeeze there – it’s your chance to fine-tune. Imagine it’s a little like adjusting your favorite seat to the perfect recline. These initial rides are like your personal test drives, helping you figure out the sweet spot for a ride that feels tailor-made just for you.
Making Adjustments Based on Comfort and Performance
Now, let’s dive into the art of adjustments – making your Peloton setup your masterpiece. Comfort is king, so start by checking how snug those shoe straps and fasteners are. You want a cozy fit, not a foot hug gone wrong. It’s like adjusting your favorite hoodie – just snug enough for maximum comfort. Then, peek at those cleats. Small shifts can make a big difference. It’s like tuning a radio until you find the perfect station. As you tweak, think about your ride – are you gliding smoothly or feeling a bit off-balance? It’s your chance to play bike maestro, finding that harmony of comfort and performance with each pedal stroke.
Common Issues and Troubleshooting Tips
Now, let’s talk about when the road gets a bit bumpy. Every rider hits a snag, but no worries – we’ve got some tricks up our sleeves. Clicking noises throwing off your groove? Check those cleats; they might just need a little snug-up. Feeling a bit uncomfortable on the sides of your feet? It could be the straps – a little looser, and voila, problem solved. It’s like fixing a hiccup in your favorite dance routine. And if your feet start feeling a bit tingly, it’s not a magic spell; it might be a circulation thing. Loosen those straps a smidge, and you’re back in the comfy saddle. If all else fails, think of Peloton support as your trusty sidekick – ready to swoop in and save the day. So, embrace the quirks, troubleshoot like a champ, and keep that Peloton party rolling!
Maintenance Tips
Keeping Your Peloton Shoes Happy and Healthy
Let’s chat about making your Peloton shoes last as long as your love for spin classes! First up, the cleaning dance. Picture this: after your ride, give those shoes a wipe-down with a damp cloth to keep them looking fresh. For a deeper clean, a bit of mild soap works wonders. Oh, and don’t forget the ventilation spots – a quick brush with an old toothbrush keeps things breezy and odor-free. These simple steps not only make your shoes last longer but also make sure your feet are happy campers.
Now, onto the cleats – those unsung heroes of your cycling adventure. Check those little screws regularly. If they’re feeling loose, a gentle tightening with a compatible wrench is all it takes. There’s no need to go superhero tight; just snug is the secret. And remember, cleat alignment is like the GPS for your comfort – a quick check and adjustment can make a world of difference.
Lastly, when your shoes start showing signs of aging, fear not! Peloton usually has replacement parts on standby. If the straps or fasteners are looking a bit tired, it’s like giving your shoes a mini makeover. And those cleats? If they’ve seen too many revolutions, swap them out for fresh ones. It’s like getting a new set of tires for your bike!
So, there you have it – a little TLC for your Peloton shoes goes a long way. Happy riding!
Conclusion
Peloton shoes are an essential part of your biking experience, providing comfort and efficiency during your rides. There are two types of Peloton shoes, the classic Peloton Bike Shoes and the Peloton Bike+ Shoes, which have a three-bolt cleat system. Peloton shoes are designed with breathable materials, durable straps and fasteners, and ergonomic designs for maximum comfort and performance.
Choosing the right size for your Peloton shoes is crucial for comfort and performance. Peloton provides sizing guides to help you find the perfect fit, and measuring your feet is a simple DIY process.
Installing cleats is an important step in setting up your Peloton shoes. Cleats are the magic glue that connects your shoes to the pedals, and adjusting their position can make a big difference in your comfort and efficiency during your rides.
Testing and fine-tuning your Peloton setup is essential for finding the sweet spot of comfort and performance. Common issues can be easily troubleshooted, and regular maintenance can keep your Peloton shoes happy and healthy for a long time.
FAQ
How do I attach the cleats to my Peloton shoes?
To attach cleats, locate the three holes on the bottom of your Peloton shoes. Align the holes with the corresponding holes on the cleats and use the provided screws to secure them. Please make sure they are snug but not overtightened.
Can I use any cycling shoes with my Peloton bike?
While you can use other cycling shoes, Peloton shoes are designed to work seamlessly with Peloton pedals and offer the best experience. Using Peloton shoes ensures a secure connection and optimal performance.