To unclip peloton shoes, simply rotate your heel outward and lift your toe, then gently pull your shoe out of the pedal. Unclipping peloton shoes is a straightforward process.
Follow these steps: rotate your heel outward, lift your toe, and gently pull your shoe out of the pedal. By rotating your heel outward and lifting your toe, you can easily release your shoe from the pedal. This allows you to comfortably remove your shoes from the peloton bike without any hassle.
Whether you’re new to using a peloton bike or just need a quick refresher, mastering the unclipping technique ensures a smooth and effortless workout experience. Keep reading to learn more about unclipping peloton shoes and additional tips for a comfortable ride.
Understanding Peloton Shoe Cycling Clips
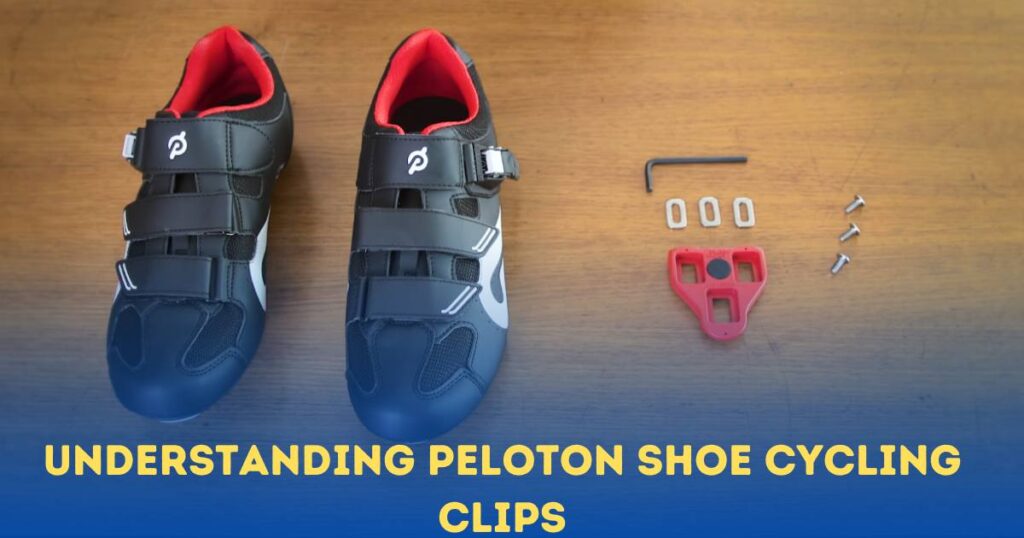
Peloton shoes are essential for any Peloton bike owner. These specialized shoes are specifically designed to work with the peloton bike pedals, providing a secure and efficient cycling experience. But what exactly are peloton shoe cycling clips, and how do they work?
Let’s delve into the details.
What Are Peloton Shoe Cycling Clips?
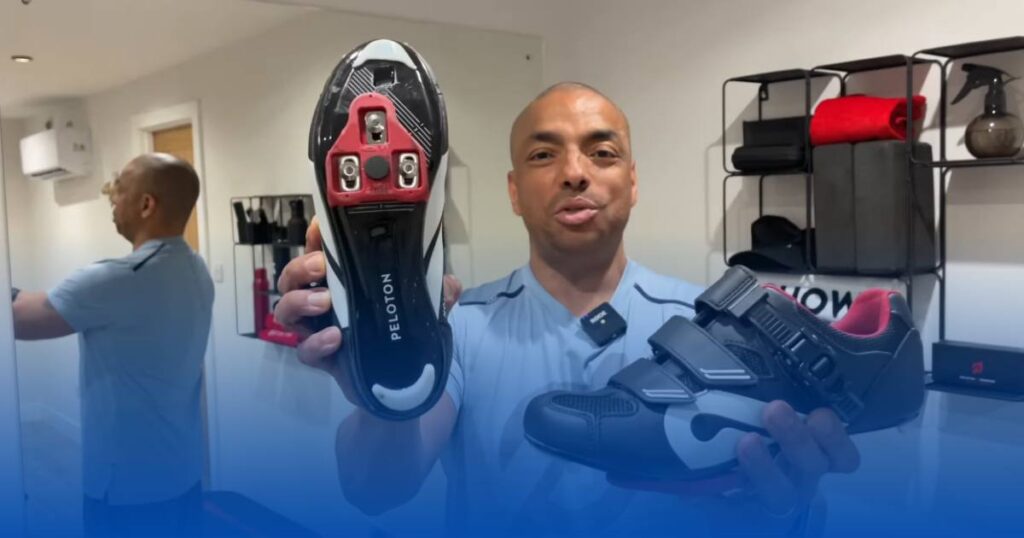
- Peloton shoe cycling clips, also known as cleats, are small metal or plastic devices that attach to the soles of peloton shoes.
- These clips lock into the pedals of the peloton bike, creating a secure connection between your foot and the pedal.
- Peloton shoe cycling clips come in two main styles: Look Delta and Spd-sl. Look delta clips are the standard option that comes with peloton shoes, while spd-sl clips offer a wider platform for those seeking additional stability.
- The clips are positioned at the ball of your foot, aligning with the center of the pedal for optimal power transfer during your ride.
How Do They Work?
- Peloton shoe cycling clips work by engaging with the bike pedals. When you step into the pedals, the clips lock in securely to ensure your foot stays connected throughout your ride.
- To use the clips, you simply line up the cleats with the pedal and press down firmly until you hear a click. This indicates that the clips are properly engaged.
- Once your ride is complete, it’s time to unclip. Unclipping is the process of releasing your foot from the pedal clips, allowing you to dismount safely.
- To unclip, you twist your heel outward, away from the bike. This motion disengages the clips and allows you to remove your foot from the pedal.
Why Is Unclipping Important?
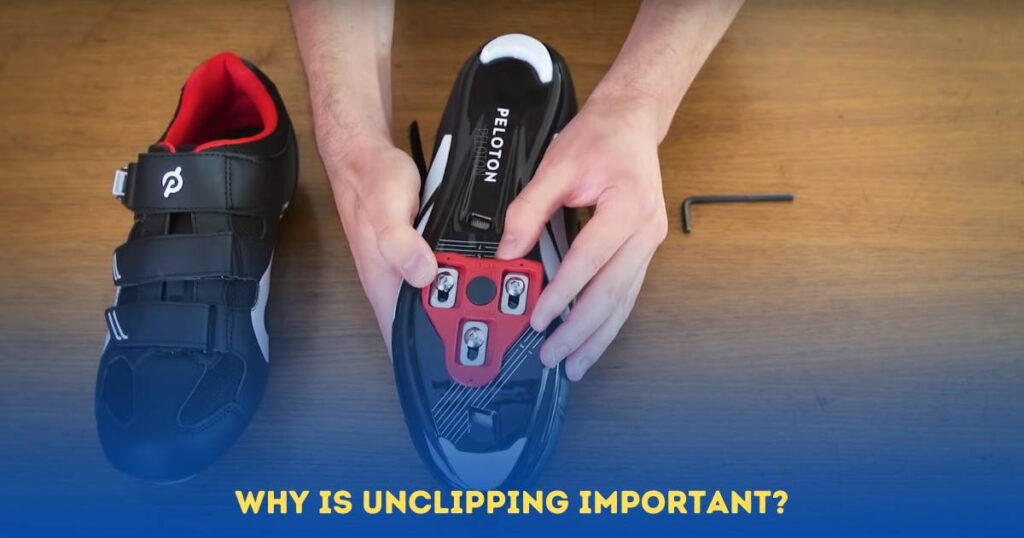
- Unclipping is crucial for a safe and controlled ride. Being able to easily detach your foot from the pedal provides the freedom to dismount quickly in any situation.
- Accidentally forgetting to unclip can result in a clumsy dismount or even a fall, potentially causing injuries.
- Learning to unclip effectively takes practice, but with time, it becomes second nature, ensuring a seamless transition from ride to dismount.
Peloton shoe cycling clips are integral to your peloton biking experience. Understanding how they work and the importance of unclipping can enhance your riding safety and overall enjoyment. So, make sure to master the art of clipping and unclipping for a smooth and secure cycling journey.
Preparing For Unclipping Shoes
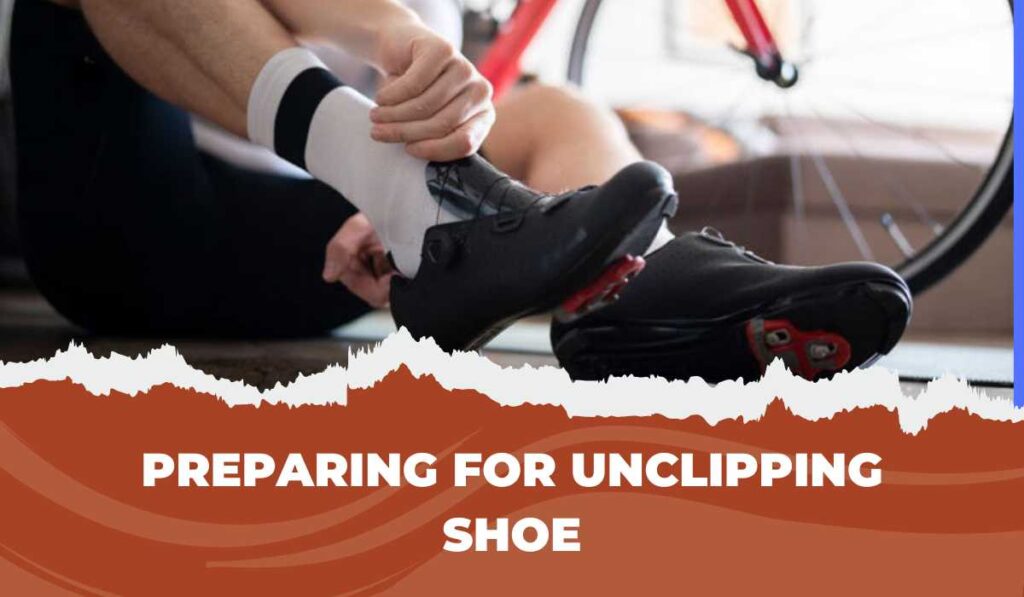
Before you hit the pedals on your peloton bike, it’s important to prepare for the unclipping process. Ensuring a secure cycling environment, proper positioning on the bike, and familiarizing yourself with the unclipping motion are the key points to consider.
Let’s dive into each of these points:
Ensuring A Secure Cycling Environment
- Make sure you have a clear and open space around the bike to avoid any obstacles while unclipping.
- Ensure the bike is on a stable and level surface to prevent any wobbling or imbalance during the unclipping process.
- Double-check that the pedals on your peloton bike are properly installed and secure.
Proper Positioning On The Peloton Bike
- Adjust the seat height and position to ensure a comfortable and efficient pedaling motion.
- Position your feet properly on the pedals, ensuring the cleats are securely attached and aligned with the pedals.
- Maintain a balanced and stable posture throughout your ride to aid in the unclipping process.
Familiarizing Yourself With The Unclipping Motion
- Practice unclipping and clipping back into the pedals before your first ride to build familiarity with the motion.
- Understand the direction and technique required to unclip your specific model of peloton shoes.
- Start with shorter rides to gradually build confidence and mastery in the unclipping process.
Remember, the key to successful unclipping lies in preparation. By ensuring a secure environment, proper positioning, and familiarizing yourself with the unclipping motion, you’ll be ready to confidently tackle your peloton rides. Happy cycling!
Unclipping Techniques For Peloton Shoes
In order to successfully unclip your peloton shoes, it’s important to master the proper techniques. Here, we will discuss two effective methods: the heel twist method and the heel lift method.
Technique 1:The Heel Twist Method
Positioning Your Foot
- Place the ball of your foot on the pedal, aligning the cleat with the pedal clip.
- Ensure that the cleat is securely engaged in the clip.
Twisting Your Heel To Unclip
- To unclip, pivot your heel outward while keeping your toe in contact with the pedal.
- Apply a gentle twisting motion to release the cleat from the clip.
- Remember to keep your weight centered and avoid leaning to one side.
Practicing The Motion
- Practice unclipping while seated on the bike to build muscle memory.
- Start with slow motions and gradually increase your speed and efficiency.
- It may be helpful to practice unclipping on a stationary surface before attempting it while riding.
Technique 2: The Heel Lift Method
Proper Foot Position
- Ensure that your cleat is securely attached to the pedal clip.
- Position your foot with the ball on the pedal and the heel slightly raised.
Lifting Your Heel To Release The Clip
- To unclip, lift your heel slightly while maintaining pressure on the ball of your foot.
- This movement will disengage the cleat from the clip.
- Keep your foot parallel to the ground and avoid excessive upward movement.
Mastering The Technique Safely
- Practice the heel lift method on a stationary bike or in a safe environment before attempting it during a ride.
- Gradually increase your speed and confidence in executing the technique.
- Remember to maintain good balance and pedal smoothly while using this technique.
By mastering these unclipping techniques for peloton shoes, you can navigate your rides with ease and confidence. Practice regularly to enhance your skills and ensure a seamless and enjoyable riding experience.
Common Mistakes To Avoid When Unclipping Peloton Shoes
Overthinking the Process
One common mistake that many beginners make when trying to unclip their Peloton shoes is overthinking the process. This often leads to unnecessary stress and frustration. Unclipping should be a smooth and natural movement, and overanalyzing it can disrupt the flow of your cycling session. Remember that Peloton pedals are designed to be user-friendly, and with practice, unclipping will become second nature.
To avoid overthinking, start by focusing on the fundamentals. Keep your mind relaxed and concentrate on the simple steps: identifying the unclip mechanism, applying steady pressure, and maintaining the correct angle. Trust your muscle memory and the design of the pedals. As you gain experience, you’ll find that the process becomes more intuitive. Remember that it’s normal to take a little time to get the hang of it, so don’t get discouraged if it doesn’t feel effortless right away.
Forcing the Unclip
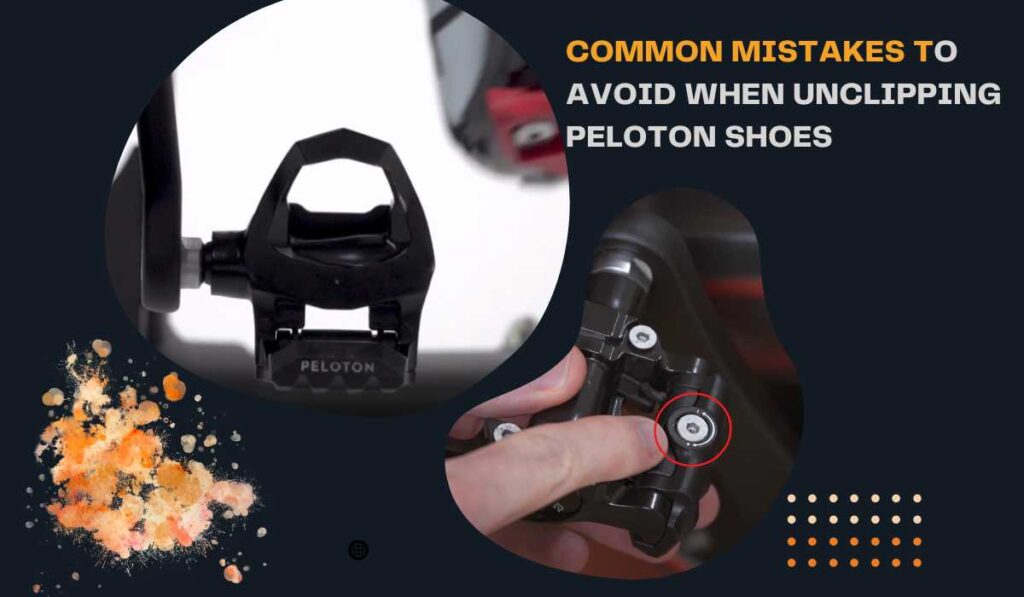
Another mistake to avoid is forcing the unclip. When riders encounter resistance while trying to unclip their Peloton shoes, their first instinct might be to use excessive force. However, this can be counterproductive and even lead to injury. Peloton pedals have adjustable tension settings to match your preferences, and forcing the unclip can damage the pedals or strain your muscles.
Instead of forcing the unclip, start by checking the pedal tension settings. You can adjust these to make unclipping easier or more challenging, depending on your comfort level. If you find yourself struggling to unclip, it’s better to stop and reassess rather than apply more force. Take a deep breath, relax your foot, and gently twist it to unclip. If you encounter persistent issues, consider consulting the Peloton support team or a professional to ensure your pedals are in good condition.
Neglecting Shoe Fit and Adjustments
Proper shoe fit and adjustments play a crucial role in unclipping smoothly and efficiently. Neglecting these aspects can lead to discomfort and difficulty when unclipping Peloton shoes. Ill-fitting shoes can cause your feet to move within the clips, making it harder to unclip or even causing pain and discomfort during your ride.
To avoid this mistake, ensure that your Peloton shoes are the right size and fit your feet snugly without being too tight. Pay attention to the position of the cleats on your shoes, as they should align properly with the pedal clips. Additionally, periodically check and tighten the screws that hold the cleats in place, as they can come loose over time. Proper shoe fit and cleat adjustments can make a significant difference in your ability to unclip effortlessly and comfortably.
Skipping Practice Sessions
Lastly, skipping practice sessions is a common mistake that can hinder your ability to unclip effectively on the Peloton bike. Learning to unclip is a skill that improves with practice and muscle memory. If you neglect regular practice, you may find yourself struggling when it matters the most, such as during an emergency stop or dismount.
Troubleshooting Common Unclipping Challenges
Stuck Clip: What To Do When The Pedal Won’T Release
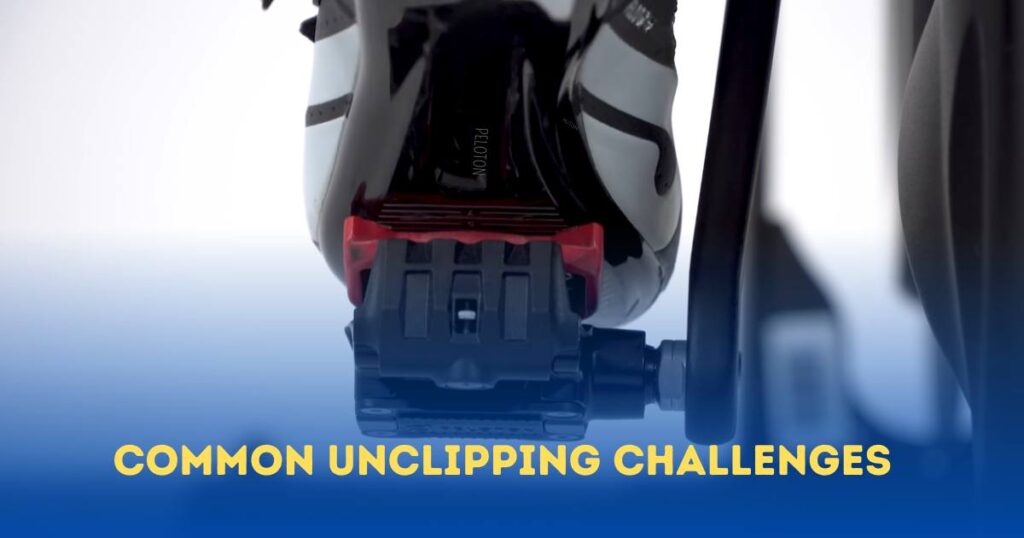
Having trouble unclipping your peloton shoes from the pedals? Don’t worry, you’re not alone! Sometimes the clips can become sticky or get jammed, making it difficult to release your foot. But fear not, we’ve got you covered with some troubleshooting tips to help you overcome this common challenge.
Here are a few steps you can follow when dealing with a stuck clip:
- Check your cleats: Start by examining your cleats to ensure they are clean and free from any debris. Sometimes dirt or grime can build up, causing the clip to stick. Use a soft cloth or brush to gently clean the cleats.
- Apply lubricant: If your cleats are clean but still not releasing smoothly, you can try applying a small amount of lubricant to the clip mechanism. Be sure to use a bike-specific lubricant and follow the manufacturer’s instructions.
- Adjust tension: Another potential solution is to adjust the tension on the clip mechanism. Most peloton pedals have an adjustable tension feature that allows you to increase or decrease the force required to unclip. Experiment with different tension levels until you find the one that works best for you.
- Practice unclipping: If you’re new to using clip-in pedals, it’s possible that you’re simply experiencing some unclipping anxiety. The more you practice unclipping, the more confident you’ll become. Start by sitting on the bike with your feet touching the ground and practice clipping in and out several times until it becomes second nature.
Remember, patience is key when dealing with a stuck clip. Take your time and don’t force the release, as this may damage the pedals or your shoes. If all else fails, it’s a good idea to reach out to Peloton customer support for further assistance.
Adjusting Clip Tension For Easier Unclipping
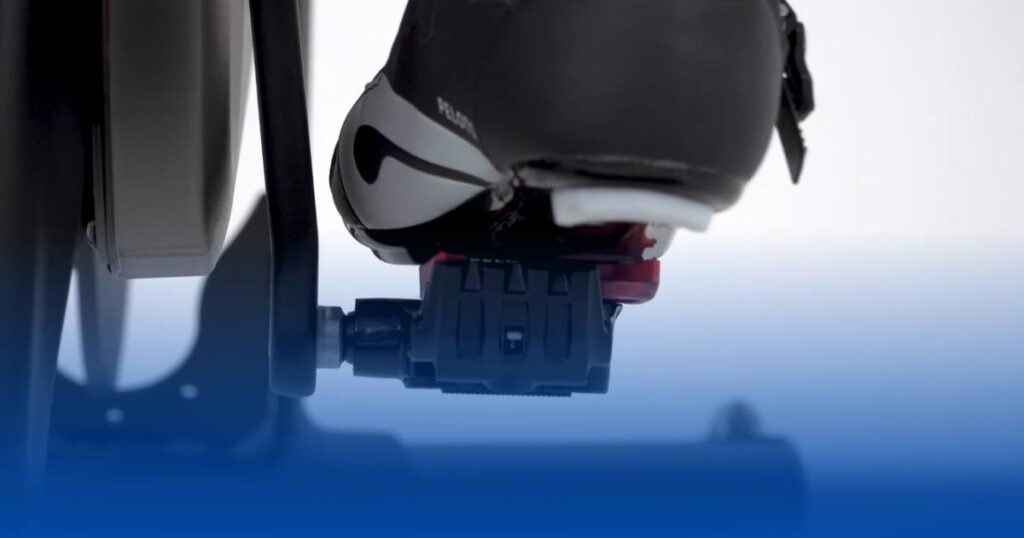
Ping from your Peloton shoes? It might be worth considering adjusting the clip tension to make the process easier and more comfortable. Here are a few key points to keep in mind when it comes to adjusting clip tension:
- Start by locating the tension adjustment screw on your peloton pedal. This screw is usually located on the back of the pedal and can be adjusted with a compatible Allen wrench.
- Turning the screw clockwise will increase the tension, making it harder to unclip. Conversely, turning it counterclockwise will decrease the pressure, making it easier to unclip.
- Find the right balance for your needs. If you’re finding it too tricky to unclip, try loosening the tension gradually until you reach a comfortable level. On the other hand, if your shoes are releasing too quickly, tighten the pressure slightly.
- Each individual might prefer a slightly different tension setting, so it’s all about finding what works best for you. Feel free to experiment and make adjustments until you find the sweet spot.
Remember, adjusting clip tension is a personal preference, and there’s no one-size-fits-all solution. Take the time to familiarize yourself with the adjustments and listen to your body to determine the optimal tension for your riding style.
Dealing With Unclipping Anxiety And Building Confidence
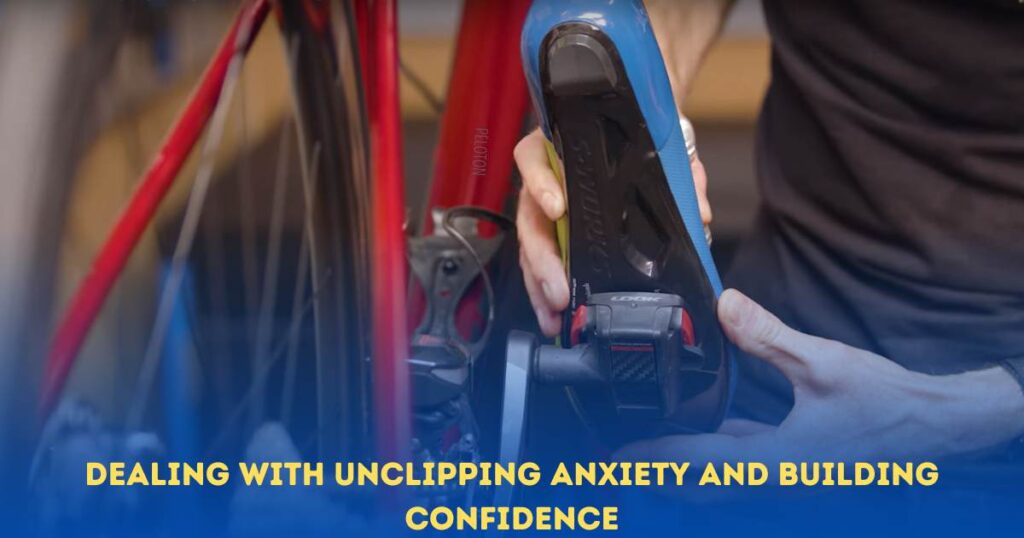
Unclipping from clip-in pedals can feel intimidating, especially for beginners. It’s common to experience a bit of anxiety when trying to release your foot from the pedal. The good news is that with practice and confidence-building techniques, you can overcome this challenge.
Here are a few tips to help you tackle unclipping anxiety:
- Start with trusted support: Begin by setting up your bike in a safe and secure environment, such as near a wall or railing that you can lean on for support. Having something to hold onto while you practice unclipping can give you an added sense of security.
- Practice on a flat surface: Start by practicing on a flat surface with minimal distractions. This will allow you to focus solely on the unclipping process without worrying about inclines or obstacles.
- Take it one step at a time: Begin with one foot clipped in and the other foot on the ground. Practice unclipping and re-clipping the foot that’s attached to the pedal. Repeat this process until you feel comfortable and confident with the motion.
- Gradually increase difficulty: As your confidence grows, start incorporating more complex scenarios into your practice sessions. This may include unclipping while riding at a slow pace or unclipping on a slight incline. Gradually challenging yourself will help build your confidence over time.
- Be patient with yourself: Remember that learning to unclip takes time and practice. Don’t get discouraged if you don’t master it right away. Celebrate small victories and be patient with yourself as you work towards becoming more comfortable with the process.
By following these tips and investing time into practicing unclipping, you’ll gradually overcome your anxiety and build the confidence needed to unclip effortlessly. Remember, it’s a skill that can be mastered with persistence and patience.
Tips For Safe And Efficient Unclipping Shoes
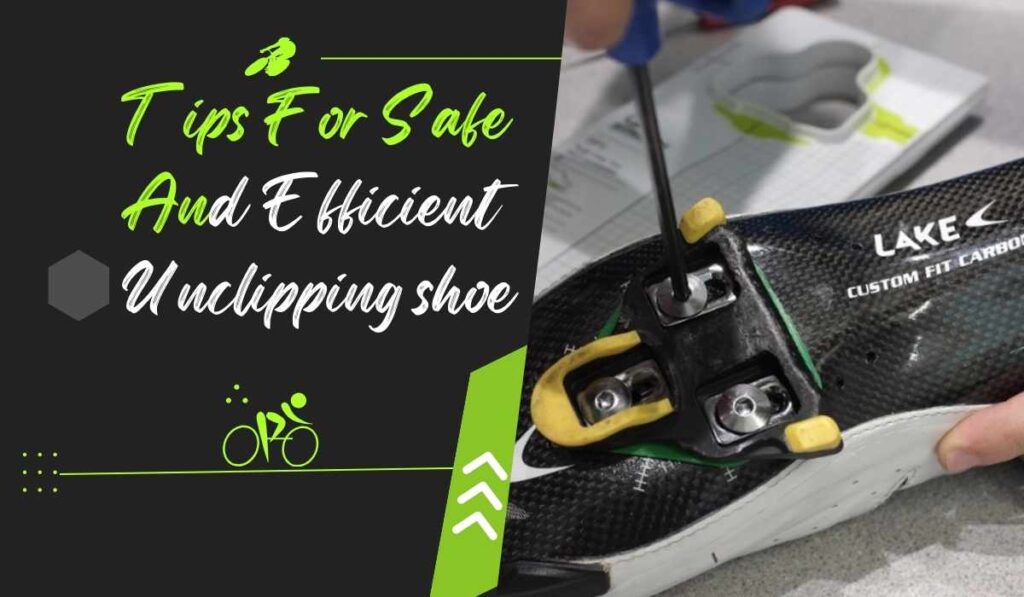
When it comes to riding with clip-in cycling shoes on your peloton bike, it’s essential to know how to unclip them properly to ensure a safe and efficient ride. Unclipping may seem daunting at first, but with the proper technique and practice, you’ll be unclipping like a pro in no time.
In this section, we’ll discuss three essential tips to help you unclip with ease: maintaining proper bike setup, wearing appropriate gear for safety and comfort, and developing muscle memory to enhance your unclipping skills.
Maintaining Proper Bike Setup
To ensure a smooth and hassle-free unclipping experience, it’s important to have your peloton bike set up correctly. Here are some key points to keep in mind:
- Position your cleats correctly: Make sure your cleats are securely attached to your cycling shoes and adequately aligned with the pedals on your peloton bike. This will help with efficient power transfer and reduce the risk of accidental unclipping.
- Adjust pedal tension: Find the right level of pedal tension that suits your preference and riding style. It’s recommended to start with a lower tension setting if you’re a beginner, as this will make it easier to unclip. Increase the tension gradually as you become more comfortable and confident.
- Check pedal and cleat condition: Regularly inspect your pedals and cleats for any signs of wear or damage. Worn-out or damaged pedals and cleats can affect the stability of your foot on the pedal and make unclipping more difficult.
Wearing Appropriate Gear For Safety And Comfort
Having the right gear not only ensures your safety but also enhances your overall riding experience. Here are some gear-related tips for safe and comfortable unclipping:
- Invest in cycling-specific shoes: Peloton shoes with cleats are specifically designed to provide a secure connection with the bike pedals. Using the right shoes ensures better power transfer and stability while making it easier to unclip when needed.
- Choose the proper clothing: Opt for lightweight, breathable, and moisture-wicking clothing that allows for freedom of movement. This will help you stay comfortable during your rides and avoid any distractions or discomfort when unclipping.
- Wear appropriate protective gear: Safety should always be a top priority. Consider wearing a well-fitting helmet and padded gloves to protect yourself in case of any unexpected falls or accidents during unclipping.
Developing Muscle Memory To Enhance Unclipping
Unclipping becomes easier with practice and developing muscle memory. Here are some tips to help you improve your unclipping technique:
- Practice unclipping on a stationary bike: Before hopping on your peloton bike, practice unclipping on a stationary bike or in a safe and controlled environment. This will help you get comfortable with the motion and build confidence in unclipping quickly when needed.
- Start with single-leg unclipping drills: Focus on unclipping one foot at a time while keeping the other foot securely clipped in. This drill will help you get accustomed to the unclipping action without losing stability.
- Gradually increase the difficulty: Once you’re comfortable unclipping with one foot, challenge yourself to unclip and switch between both feet quickly. This will help you build coordination and speed in unclipping, making the process more efficient.
Remember, practice makes perfect. The more you practice unclipping, the more natural and effortless it will become. With these tips in mind, unclipping your peloton shoes will soon become second nature, allowing you to fully enjoy your rides with confidence and ease.
Transitioning to Clipless Pedals
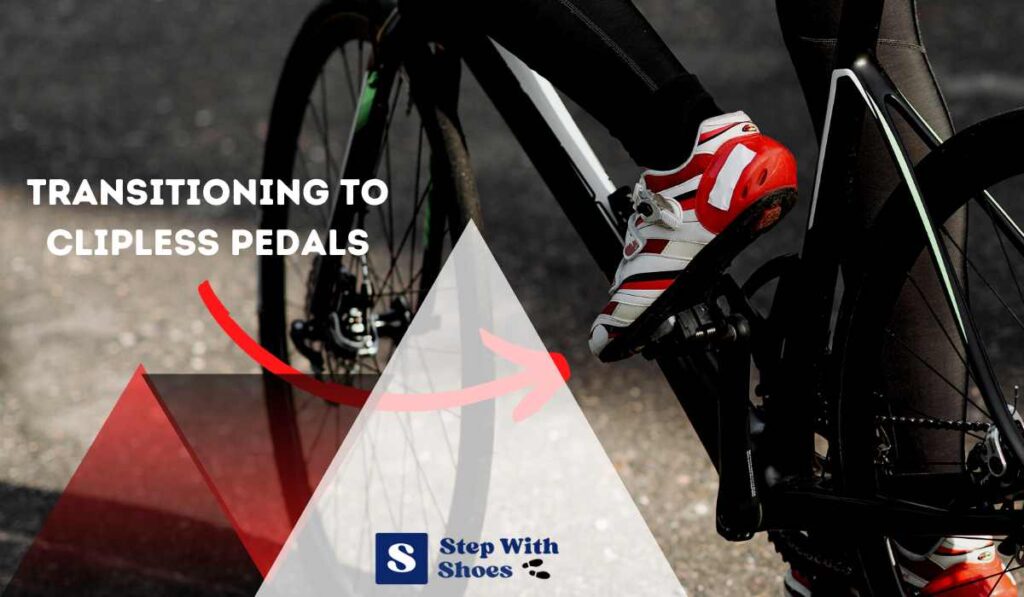
Exploring the Benefits of Clipless Pedals
Before making the transition from Peloton clips to clipless pedals, it’s crucial to understand the numerous benefits that clipless pedals offer. Despite their name, clipless pedals involve attaching your cycling shoes to the pedals using a cleat mechanism. These pedals provide several advantages over traditional flat pedals or Peloton’s toe clip design.
One of the primary benefits is improved power transfer. With clipless pedals, your cycling shoes become an extension of the pedal, allowing you to apply force efficiently throughout the entire pedal stroke. This results in increased speed and efficiency during your rides. Moreover, clipless pedals provide a more secure and stable connection between your feet and the bike, reducing the chances of slipping or losing contact, especially when cycling at high speeds or over challenging terrain.
Another significant advantage is enhanced pedaling efficiency. Clipless pedal systems often come with adjustable tension settings, enabling you to customize the level of resistance when unclipping. This customization can significantly enhance comfort and reduce the risk of injury. Additionally, clipless pedals promote a consistent and natural foot position, which can reduce the likelihood of developing discomfort or pain during extended rides.
Choosing the Right Clipless Pedal System
Selecting the appropriate clipless pedal system is a crucial step in your transition from Peloton clips to clipless pedals. There are various clipless pedal systems available, each with its own design and characteristics. Two of the most popular systems are SPD (Shimano Pedaling Dynamics) and Look-style pedals.
When choosing a clipless pedal system, consider your specific cycling goals and preferences. SPD pedals are known for their versatility and are frequently used in mountain biking and indoor cycling settings. They are prized for their durability and ease of use, making them a suitable choice for beginners. Look-style pedals, on the other hand, are often preferred by road cyclists for their larger platform and efficient power transfer.
It’s essential to test different pedal systems to determine which one feels most comfortable and suits your riding style. Keep in mind that you’ll also need compatible cycling shoes equipped with the appropriate cleats for your chosen pedal system. Once you’ve made your selection, consult with a knowledgeable bike shop or Peloton customer support to ensure you have the right components and receive guidance on installation and setup.
Transitioning from Peloton Clips to Clipless Pedals
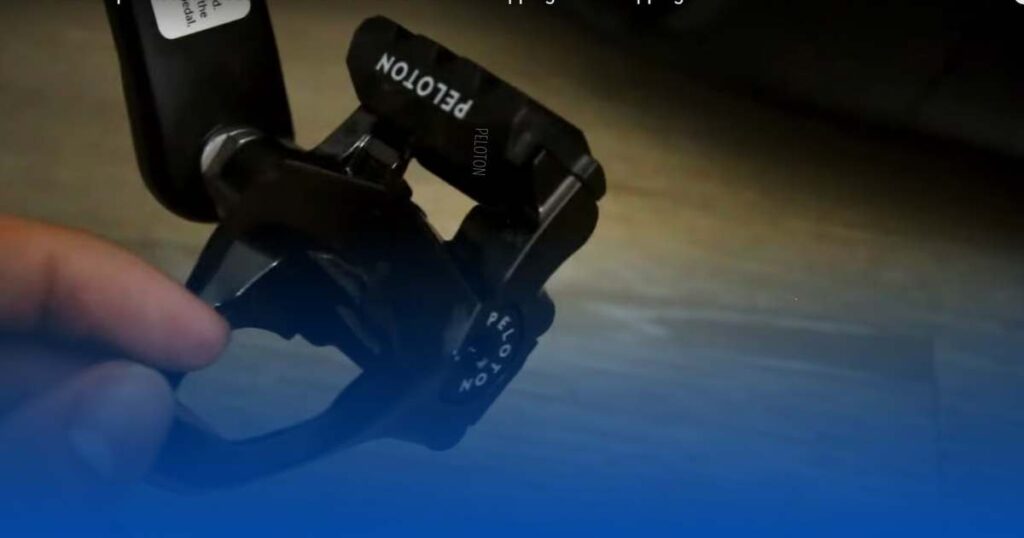
Transitioning from Peloton clips to clipless pedals is a manageable process with the right approach. Begin by practicing with your new clipless pedals in a controlled environment, such as an empty parking lot or a quiet street. Familiarize yourself with the clipping-in and unclipping motions to build confidence.
One helpful tip during the transition is to gradually reduce the tension on your clipless pedals. Many clipless pedal systems have adjustable tension settings that control how easy or challenging it is to unclip. Starting with lower tension settings will make it easier to unclip, giving you peace of mind as you adapt to the new system.
Additionally, consider keeping your Peloton bike’s original pedals and clips as a backup option during the transition period. This way, you can switch back if you encounter challenges or discomfort with the clipless pedals.
Conclusion: Mastering The Art Of Unclipping Peloton Shoes
Unclipping peloton shoes may seem like a simple task, but it can take some practice and patience to master. In this section, we’ll recap the techniques for unclipping, discuss the importance of practice and patience, and highlight the benefits of efficient and stress-free unclipping.
Recap of Unclipping Techniques
When it comes to unclipping your peloton shoes, there are a few essential techniques to keep in mind:
- Twist and release: This is the most common method for unclipping. Twist your heel outward to release the shoe from the pedal. Practice this motion to ensure a smooth and effortless unclipping experience.
- Heel drop: Another technique involves dropping your heel downward while maintaining pressure on the cleat. This movement will disengage the shoe from the pedal. Experiment with heel placement and the amount of pressure to find what works best for you.
- Quick flick: For more experienced riders, a short film of the ankle can swiftly release the shoe from the pedal. This method requires precision and practice to ensure a seamless unclipping motion.
Importance Of Practice And Patience
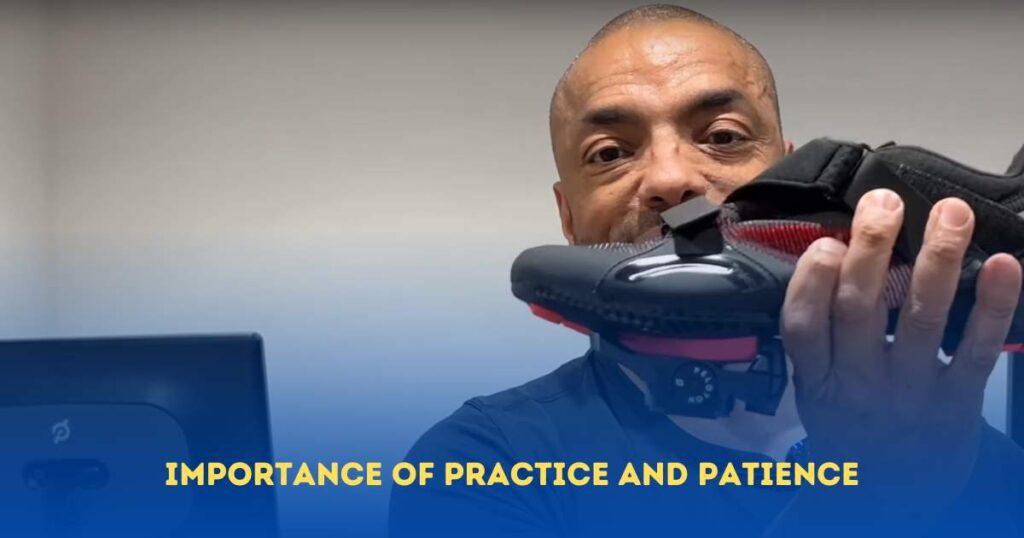
Like any new skill, mastering the art of unclipping peloton shoes takes time and patience. Here’s why practice is essential:
- Muscle memory: A consistent approach will help develop muscle memory, making unclipping second nature. As you repeatedly perform the motion, your body will become familiar with the required movements, leading to more efficient unclipping.
- Confidence boost: Practicing unclipping techniques regularly can boost your confidence on the bike. When you’re confident in your ability to disengage your shoes from the pedals, you can focus more on your ride and less on the fear of getting stuck.
- Safety first: Practicing unclipping techniques can enhance safety during your rides. Being able to effortlessly unclip can prevent falls and injuries, particularly in situations that require quick stops or unexpected obstacles.
Enjoying The Benefits Of Efficient And Stress-Free Unclipping
Once you’ve mastered the art of unclipping peloton shoes, you can enjoy several benefits that come with efficient and stress-free unclipping:
- Comfort and convenience: Efficient unclipping allows for easier transitions on and off the bike. Whether you’re participating in a live class or enjoying a scenic ride, smooth unclipping ensures a more comfortable and enjoyable experience overall.
- Injury prevention: Proper unclipping techniques can help prevent injuries, such as strains or sprains, that may result from forcefully disengaging the shoe from the pedal. By mastering the art of unclipping, you reduce the risk of potential mishaps.
- Ride flexibility: When unclipping becomes effortless, you’ll have the flexibility to shift your feet on the pedals, promoting a more comfortable and versatile riding position. This freedom allows you to adapt your stance for different types of workouts or personal preferences.
Mastering the art of unclipping peloton shoes involves understanding the different techniques, practicing regularly, and being patient with yourself. With time and effort, you’ll enjoy the benefits of efficient and stress-free unclipping, enhancing your overall peloton experience. So keep practicing, stay patient, and soon you’ll be unclipping like a pro!
How to Unclip from a Peloton Bike
Unclipping from a Peloton bike is a fundamental skill for every rider, ensuring a safe and efficient cycling experience. Peloton uses a cleat and pedal system that secures your feet to the pedals during your ride. To unclip, you need to release your shoes from the pedal mechanism. Here’s a detailed guide on how to unclip from a Peloton bike:
- Identify the Unclip Mechanism: Before attempting to unclip, it’s essential to locate the unclip mechanism on your Peloton pedals. Peloton pedals typically have a small, adjustable tension knob or lever on one side. This knob controls the tightness of the clip mechanism. Turning it counterclockwise decreases the tension, making it easier to unclip.
- Practice Unclipping While Stationary: Start by sitting on your Peloton bike while stationary, with one foot clipped in and the other foot resting on the floor beside the pedal. To unclip, twist your heel outward away from the bike. This motion should release the cleat from the pedal mechanism. Initially, practice this motion slowly and deliberately until you get the hang of it.
- Maintain the Correct Angle: When unclipping, pay attention to the angle at which you twist your heel. The ideal angle can vary from person to person, so it’s essential to find what’s most comfortable for you. Some riders prefer to twist their heels outward at a slight angle, while others prefer a more pronounced movement. Experiment with different angles to determine what works best for you.
- Practice Unclipping While in Motion: Once you’re comfortable unclipping while stationary, incorporate it into your riding routine. Start by unclipping and clipping back in while cycling at a slow pace. Gradually increase your speed and practice unclipping during different parts of your ride. The goal is to make unclipping a seamless and instinctive action.
- Troubleshooting: If you find that unclipping is challenging or requires excessive force, consider adjusting the tension knob on your Peloton pedals. Turning it counterclockwise will reduce tension, making unclipping easier. If you’re still having
Unclipping a Peloton shoe buckle

Unclipping a Peloton shoe buckle is a straightforward process. Still, it’s essential to know the proper steps to ensure a smooth and hassle-free experience. Peloton shoes often come equipped with a ratcheting buckle system that provides a secure and customizable fit. Here’s a detailed guide on how to unclip a Peloton shoe buckle:
- Identify the Buckle: The first step is to locate the buckle on your Peloton shoes. The pin is typically positioned on the upper part of the shoe, near the ankle. It consists of a strap with a ratcheting mechanism and a release button.
- Release the Ratchet: To begin unclipping, locate the small release button on the side of the buckle. This button is designed to disengage the ratcheting mechanism that secures the strap. Gently press the release button to unlock the clip.
- Loosen the Strap: Once the buckle is unlocked, you can begin to loosen the strap by pulling it away from the shoe. The ratcheting mechanism allows you to make minor adjustments to the strap’s tightness. Continue removing the belt until it is loose enough to comfortably slip your foot out of the shoe.
- Remove Your Foot: With the strap sufficiently loosened, carefully slide your foot out of the Peloton shoe. Be mindful not to force your foot out, as this can cause damage to the shoe or buckle. The goal is to ease your foot out of the shoe gently. Inspect and Maintain: After unclipping, take a moment to inspect the buckle, strap, and shoe for any dirt or debris that may have accumulated. Keeping your Peloton shoes clean and well-maintained ensures that the hook and strap continue to function correctly.
- Re-Engage the Buckle: When you’re ready to put your Peloton shoes back on, engage the ratchet mechanism by threading the strap through the buckle and pulling it snugly. Ensure that the belt is tightened to your preferred level of comfort and support. Press the release button once more if you need to make further adjustments.
- Practice: If you’re new to Peloton shoes or the buckle system, it’s a good idea to practice unclipping and re-engaging the buckle a few times while sitting down. This will help you become familiar with the process and ensure that you can easily adjust your shoes during your rides.
Easiest Way to Unclip Peloton Shoes
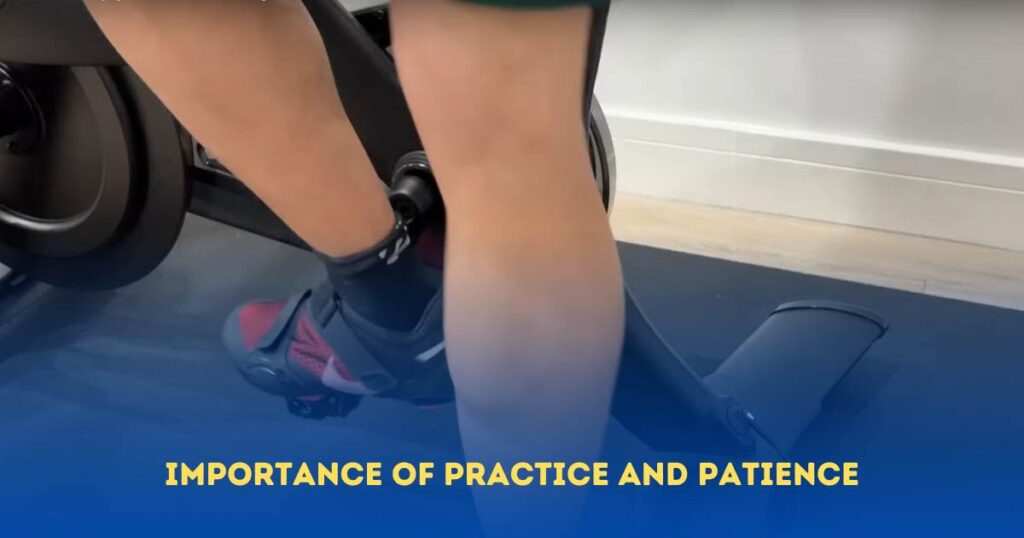
Unclipping your Peloton shoes is a breeze. Begin by locating the cleat on the bottom of your shoe; it’s usually positioned towards the ball of your foot. Gently twist your heel outward to disengage from the pedal.
To make this process smoother, practice the motion while stationary before hopping on the bike. A slight heel twist, and you’re free from the pedal, ready to dismount effortlessly.
If you find it challenging, check the tension settings on your pedals. Lowering the tension makes unclipping easier, ensuring a swift exit when needed. It’s a simple adjustment that can enhance your overall Peloton experience.
Remember, a smooth dismount is not just about technique; it’s also about comfort. Ensure your shoes are snug but not overly tight, allowing for easy movement when unclipping.
In summary, mastering the art of unclipping on your Peloton is a quick and straightforward process. Practice, adjust your tension settings, and prioritize comfort for a seamless and enjoyable ride every time.
Frequently Asked Questions Of How To Unclip Peloton Shoes
How Do You Unclip Peloton Shoes?
To unclip peloton shoes, simply twist your heel outwards while keeping your foot level. This will disengage the cleat from the pedal, allowing you to easily remove your foot. Practice unclipping in a safe and controlled environment before attempting it during a workout.
Can You Wear Regular Shoes On Peloton?
No, regular shoes cannot be used on peloton pedals. Peloton requires special cycling shoes with a 3-bolt cleat system. These shoes securely clip into the peloton pedals, providing optimal power transfer and stability while riding.
Do Peloton Shoes Come With Cleats?
Yes, when you purchase peloton shoes, they come with compatible cleats. These cleats are attached to the bottom of the shoes and are necessary for clipping into the peloton pedals. Make sure to align the cleats correctly for a comfortable and efficient ride.
Conclusion
Learning how to unclip peloton shoes is a crucial skill to have for an enjoyable and safe indoor cycling experience. By following these simple steps, you can effortlessly detach your feet from the pedals and avoid any potential accidents or injuries.
Remember to always practice proper technique and stay mindful of your body position to ensure a smooth unclipping process. Additionally, regularly inspecting your shoes and pedals for any damage or wear and tear is essential for both performance and safety.
By maintaining your equipment and mastering the art of unclipping, you can fully immerse yourself in the exhilarating world of peloton cycling, free from any worries or hindrances. Happy cycling!
