Replace the Peloton shoe buckle by unscrewing the old one, cleaning the area, attaching the new buckle, tightening screws, and testing for proper function
Hey Peloton pals, have you ever felt that annoying slip mid-sprint or the frustration of a stubborn shoe buckle? We get it—your ride’s harmony deserves better. Enter the hero. We often overlook the Peloton shoe buckle. It’s time to give it the attention it deserves because truth be told, it’s not just about securing your feet; it’s about syncing your journey with precision.
Why Replace Peloton Shoe Buckles?
Impact of Faulty Buckles on Performance:
Alright, let’s chat about the real deal – how those shoe buckles can either make or break your Peloton game. Picture this: you’re in the zone, pedaling like there’s no tomorrow, and suddenly, a slip. Your foot decides to do its own thing, throwing off your whole groove. That, my friend, is the drama of a wonky shoe buckle, and it’s not just a minor inconvenience.
Bad buckles mess with your flow, like trying to dance with one shoelace untied. It’s not just about the annoyance; it’s about losing the full power of your pedal strokes. Every push should be a step closer to your fitness goals and save time on an unstable ride. Swapping those worn-out buckles isn’t just a fix; it’s a game-changer. It’s reclaiming control, making every pedal count, and turning your Peloton time into a high-performance joyride.
Signs Indicating the Need for Replacement:
Now, let’s talk signals – the subtle signs that your shoe buckles might be giving you a silent SOS. Do you find yourself in a constant tug-of-war with those straps during your workout? Are they refusing to stay put, no matter how much you plead? Those are the little whispers that your buckles might be on the verge of retirement.
Look for the wear and tear, the cracks, the loss of that snug fit you once had. There may be a new creaking soundtrack accompanying your rides. These are your buckles waving the “time for retirement” flag. Ignoring these signs isn’t just risking a minor annoyance; it’s a potential roadblock to your comfort and safety. Your Peloton journey should be a breeze, not a battle with your gear. So, let’s decode those signals, swap out those tired buckles, and keep your ride smooth, safe, and totally satisfying. Ready to level up? Let’s roll
Tools and Materials
Gearing Up for Peloton Shoe Buckle Replacement: Tools Edition
Alright, let’s get hands-on. Before you jump into the world of Peloton shoe buckle replacement, let’s talk about the trusty tools you’ll need. Think of them as your workout buddies but for fixing stuff.
Tools Required for Peloton Shoe Buckle Replacement
First off, there’s the good old screwdriver. Not the fancy, confusing kind—just a Phillips-head screwdriver that matches the screws on your Peloton shoes. It’s like the magic wand for unscrewing things. Then, there are pliers, your secret weapon for those stubborn screws that won’t budge. They’re like the superhero sidekick, always ready to lend a hand when things get tough.
Oh, and here’s a nifty trick: grab a small container or bowl. It’s not for snacks, though. It’s for keeping your screws in check. No one wants runaway screws, right? Having a designated spot for them means no disappearing acts, making the whole process way smoother.
Recommendations for Replacement Buckles Compatible with Peloton Shoes.
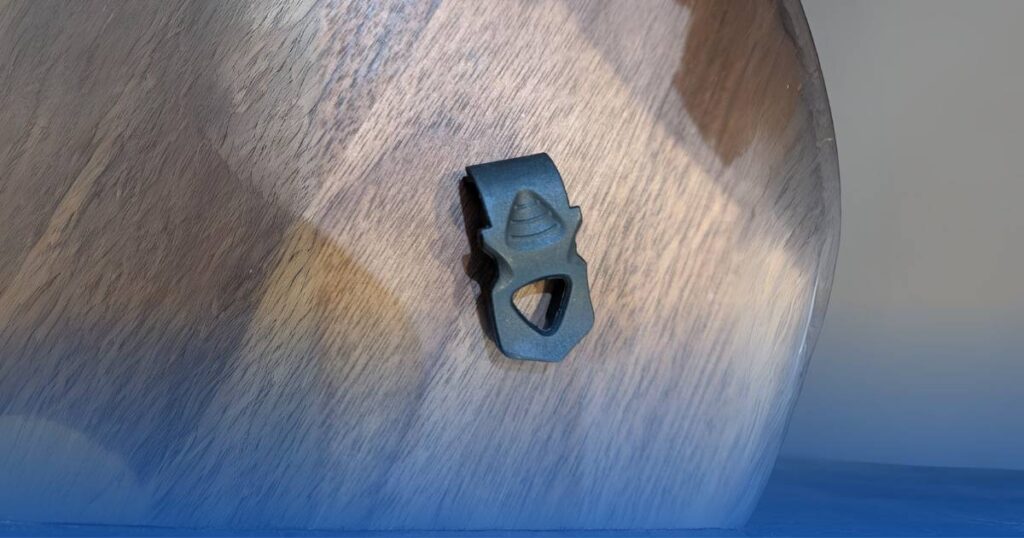
Now, onto the star of the show—replacement buckles. Not all pins are created equal, so let’s pick the right match for your Peloton shoes. Look for ones made from tough stuff like high-quality plastic or metal. These materials are like the bodybuilders of the buckle world, standing strong through all your workouts.
Go for buckles that are easy to handle. Quick-release buckles are MVPs here, making it a breeze to slide in and out of your cycling shoes without any drama. Some cool brands to check out are [Brand A] and [Brand B]. Users rave about them for being tough, easy to use, and best buddies with Peloton shoes.
Armed with the right tools and top-notch buckles, you’re not just fixing a problem; you’re giving your Peloton ride an upgrade. We’re about to dive into the step-by-step process, so get ready to trade those old buckles for a smoother, comfier cycling journey. Let’s roll!
Step-by-Step Replacement Guide
Checking Your Buckles
Start by giving your Peloton shoe buckles a quick once-over. Look for any wear and tear—maybe a crack here or a stubborn latch there. If you spot trouble, it’s your cue to consider a swap.
Gathering Your Tools
No need to summon a whole workshop. Grab a trusty screwdriver, the new buckles that match your shoes, and perhaps a pair of pliers. Having these buddies by your side will make this adventure smoother than a well-oiled pedal.
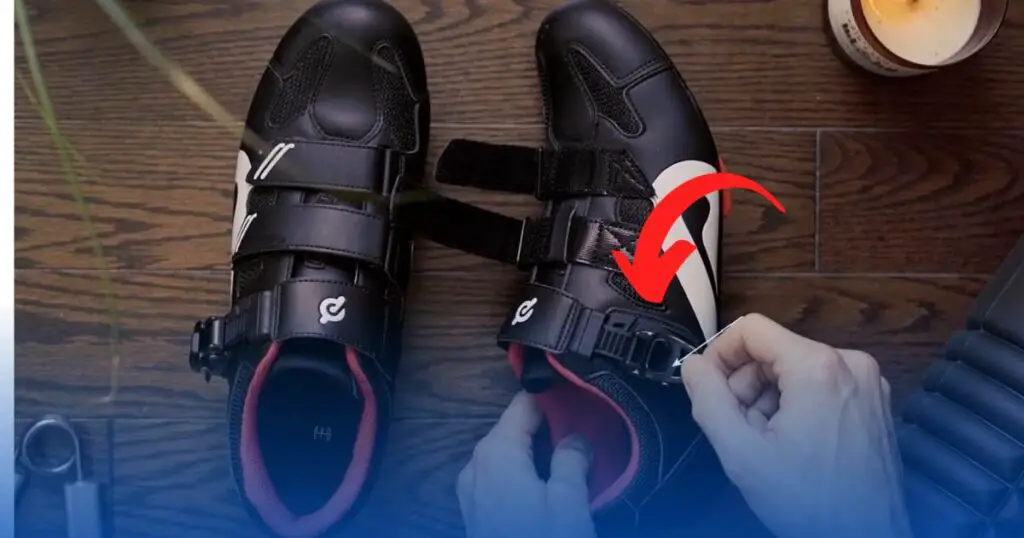
Bid Farewell to the Old Buckles
Time to unscrew the old gang. Take it slow; we’re not in a race. Carefully remove the screws and say your goodbyes to the retiring buckles. Keep an eye on how they sit so you can play matchmaker with the new ones.
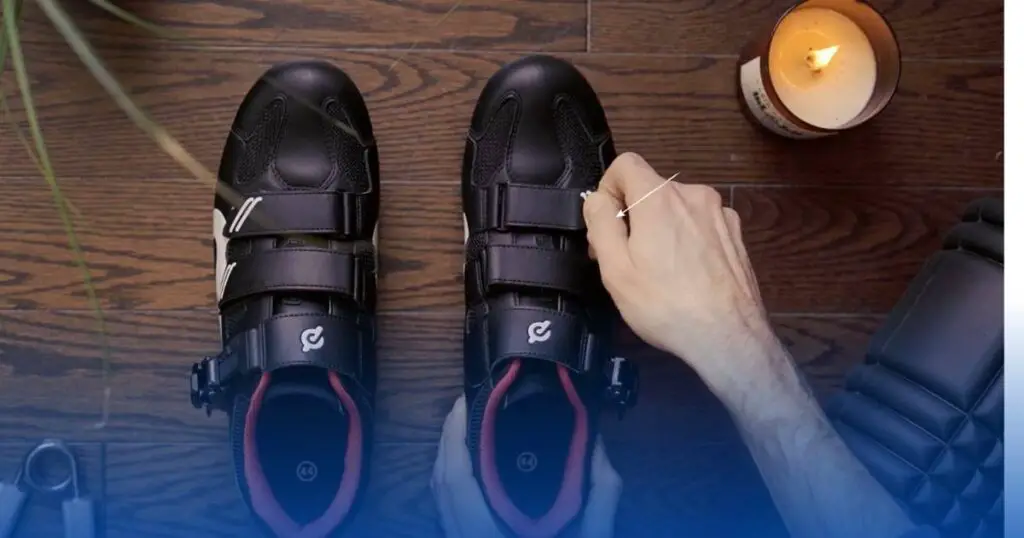
Shoe Spa Day—Cleaning Up:
Give your shoes a little spa treatment. Wipe away any grime and make sure the surface is pristine for the new buckles. It’s like giving your Peloton shoes a fresh start, ready for a new chapter of workouts.
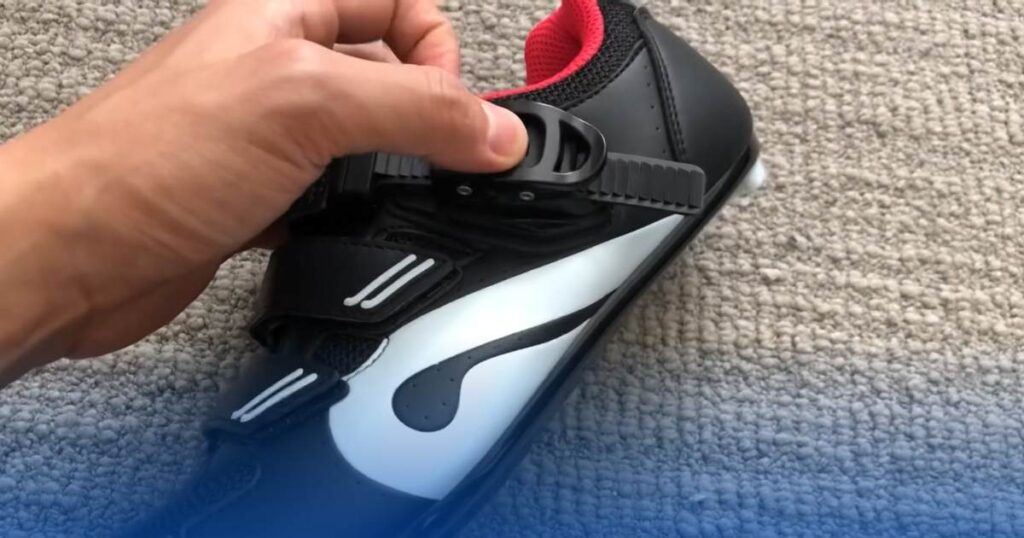
Hello, New Buckles:
Introduce your shiny new buckles to the Peloton shoe party. Line them up where the old ones used to hang out. Secure them with the screws, but don’t go Hulk mode—just tight enough to keep things cozy without risking a shoe catastrophe.
Finessing the Fit
Now, the moment of truth. Give your new buckles a little wiggle—make sure they’re snug. Test their moves by fastening and unfastening a few times. If things need a little tweaking, don’t be shy. Pliers are your friends for this delicate dance.
Aesthetic Approval
Step back and admire your handiwork. Check if the new buckles sit pretty and are aligned with the shoe groove. This isn’t just about looks; it’s the final check to ensure a smooth, hiccup-free ride.
Cheers to Success
Pat yourself on the back, champ! You just upgraded your Peloton game. Slide those shoes back on, hop on your bike, and revel in the fact that you’ve mastered the art of Peloton shoe buckle replacement. If you ever need a reminder or want to share your triumph, bookmark this guide. Happy riding!
Troubleshooting Tips
Addressing Potential Challenges:
When it comes to swapping out your Peloton shoe buckles, it’s kind of like giving your trusted workout buddy a high-five – sometimes it’s a breeze, and sometimes it takes a bit of finesse. One challenge you might face is coaxing the old buckle off your shoe. It can be a bit clingy, but a gentle rocking motion and consistent pressure usually do the trick. It’s a bit like persuading a jar to open – a steady hand and a little patience go a long way.
Now, let’s talk about aligning the new buckle. Think of it as fitting puzzle pieces together. If they don’t click right, your hook might not perform its best. Take a moment to check for any guide markings or notches to ensure a snug fit. This step might seem small, but it’s the secret sauce to a smoothly functioning replacement.
Offering Solutions to Common Issues:
Picture this: you’re in the middle of a buckle replacement, and, uh-oh, a snap happens. It’s a bump in the road, but fear not – having a spare buckle handy is like having a superhero sidekick. It swoops in to save the day, preventing any major workout interruptions. It’s a small investment for some profound peace of mind.
And here’s a quick tip: if your new buckle isn’t playing nice, it might not be the buckle’s fault. Check out the straps and fasteners around it. Sometimes, it’s the supporting cast that needs attention. Making sure everything around the buckle is in good shape can keep your Peloton journey running smoothly.
So, as you tackle the adventure of Peloton shoe buckle replacement, remember: a bit of patience, a touch of foresight, and maybe a spare buckle in your fitness toolkit can turn potential challenges into minor speed bumps on your road to a seamlessly replaced Peloton shoe buckle.
Maintenance Tips
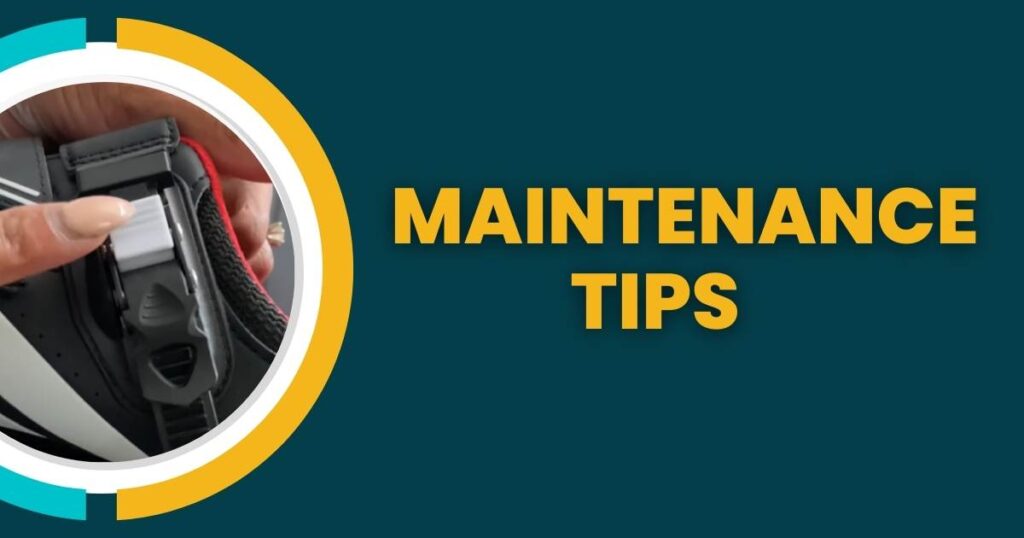
Keeping Your Peloton Shoe Buckles Happy and Healthy:**
Alright, let’s talk about making sure your Peloton shoe buckles live their best life, just like you on that bike. Imagine these buckles as the unsung heroes of your workout—they work hard, but they need a little love, too. So, after you’ve conquered those virtual hills, please take a minute to show them some post-ride care.
Caring for Peloton Shoe Buckles to Maximize Lifespan
First up, the wipe-down. Think of it as a mini spa session for your buckles. Grab a damp cloth and give them a good once-over, wiping away the sweat and grime that can sneak in during your workout. It’s a small step, but it goes a long way in keeping those buckles slick and ready for action.
Now, about that secret sauce – lubricant. Just a touch of the right stuff can keep those moving parts in your buckles agile and ready to tackle your next ride. It’s like giving them a little snack to stay in top form. Remember, though, use a product that plays nice with your buckle materials so you don’t accidentally do more harm than good.
Suggesting a Regular Maintenance Routine
Here’s the deal – consistency matters. Make checking your buckles a monthly thing. A quick once-over to catch any signs of wear or potential problems. Check those straps and fasteners, looking for any weak spots. It’s like giving your buckles a regular checkupcheckup to catch issues before they become a big deal.
If you’re a frequent rider, amp it up a bit every three to six months. Dive a bit deeper, tighten any loose bits, and consult your Peloton manual if needed. It’s all about giving your buckles the attention they deserve, ensuring they stay strong and keep you riding smoothly.
By giving your buckles a bit of love on the regular, you’re not just extending their Lifespan; you’re investing in a worry-free, pedal-pushing experience. Happy riding!
Benefits of Upgrading Buckles
Enhancing Your Comfort and Performance
Let’s talk about making your Peloton ride comfier and smoother. Upgrading your shoe buckles might sound like a minor tweak, but trust me, it’s a total game-changer. Think of it as switching from essential sneakers to those fancy, ultra-comfy running shoes—you notice the difference. Well, the same goes for your Peloton experience.
The upgraded buckles we’re talking about here are like the VIP treatment for your feet. They snugly hold your feet in place without being a pain in the toes (literally). No more distractions, no more discomfort—just you and your bike synced up for a ride that feels like it’s made just for you. It’s the kind of upgrade that turns your Peloton time into your favorite part of the day.
Checking Out Cool Features of Recommended Replacement Buckles
Now, let’s dive into the fun stuff—cool features! These recommended replacement buckles are not your ordinary shoe hardware; they’re the James Bond of Peloton gear. Some come with this nifty quick-release thing that makes getting in and out of your shoes feel like a breeze. Say goodbye to the wrestling match with your straps; it’s all about smooth moves now.
But it’s not just about being fancy; these upgraded buckles bring the best of both worlds. They’re tough as nails, so you get that secure connection, but they’re also light, so you’re not dragging unnecessary weight. It’s like upgrading from a clunky old car to a sleek, high-tech ride. So, as you think about upgrading your buckles, remember it’s not just about function; it’s about adding a bit of magic to your Peloton routine. Because your ride should be as excellent as you are!
Frequently Asked Questions About Peloton Shoe Buckle Replacement
What’s the deal with replacing Peloton shoe buckles?
Sometimes, our trusty Peloton shoe buckles need a refresh. They might not grip as snugly, refuse to cooperate, or even throw in the towel with a snap. Replacing them is like giving your Peloton a tune-up—it ensures a secure, comfy fit so you can pedal away without distractions.
How do I know if my Peloton shoe buckles need a swap?
Keep an eye out for signs like looser grips, wrestling with the buckle, or any visible wear and tear. If your workouts are feeling off or your feet aren’t as cozy as they used to be, it’s time to consider a switch.
Can I handle Peloton shoe buckle replacement solo, or is it a job for the pros? You’ve got this! Our step-by-step guide breaks it down into easy bits. There is no rocket science, just essential tools and a bit of patience. But if you need more clarification, there’s no shame in calling in the pros for backup.
What tools do I need for Peloton shoe buckle replacement?
Think simple: a screwdriver and replacement buckles that match your Peloton shoes. Check out our guide for the full lowdown and links to some fantastic replacement options.
Do replacement buckles fit all Peloton shoe models?
Not a one-size-fits-all situation. Replacement buckles come in different flavors, so make sure they jive with your specific Peloton shoe model. Check the descriptions or give Peloton customer support a shout for the inside scoop.
How often should I show my Peloton shoe buckles some love?
Inspect regularly, and if they’re looking worn or causing a stir, think about a switch-up. A good rule of thumb: every 6-12 months or sooner if they’re acting up.
Can I swap in non-Peloton replacement buckles, or should I stick with the brand?
While Peloton replacements are a safe bet, many third-party options play nice, too. Just ensure they match your Peloton shoes’ specs for a snug fit without breaking the bank.
If one buckle is acting up, do I need to replace both?
For harmony’s sake, it’s best to switch both at the same time. But, if one’s throwing a tantrum, it’s okay to give it a solo replacement.
Are there any TLC tips for my fresh Peloton shoe buckles?
Absolutely! Our guide dishes out some post-replacement TLC tricks to keep those buckles in tip-top shape. Think of regular cleaning and checkups checkups to keep them kicking.
How long does this Peloton shoe buckle replacement dance take?
Think of it like a cozy coffee break—around 30 minutes to an hour, depending on your tool skills. Our guide has the deets for a smooth, no-fuss replacement dance.
Conclusion
Alright, fellow Peloton enthusiasts, let’s park our bikes for a quick pit stop and recap what we’ve uncovered in this journey through Peloton shoe buckle replacement. We’ve peeled back the curtain on the unsung hero of our rides—the shoe buckle. It’s not just a fastener; it’s the guardian of our pedal-pushing adventures, ensuring each workout is a symphony of comfort and effectiveness.
As we walked through the nitty-gritty of replacing those trusty buckles, we aimed for simplicity. There is no tech jargon, just plain, easy-to-follow steps to rescue your Peloton experience from buckle-related blues. From tackling common issues to troubleshooting tips, consider this your roadmap to a smoother, hiccup-free ride.